

So we've all been there. Paid out a shed load of cash for the Phantom, got the extra battery, gone the FPV route and wanting more more more!! First thing that stumps us is expansion space and the fact we are now broke and on the brink of being thrown out of the house by the Missus 'If I see another parcel for that **** flying thing!!'
So this is what I did to get a bit more real-estate to use for FPV and/Or battery.
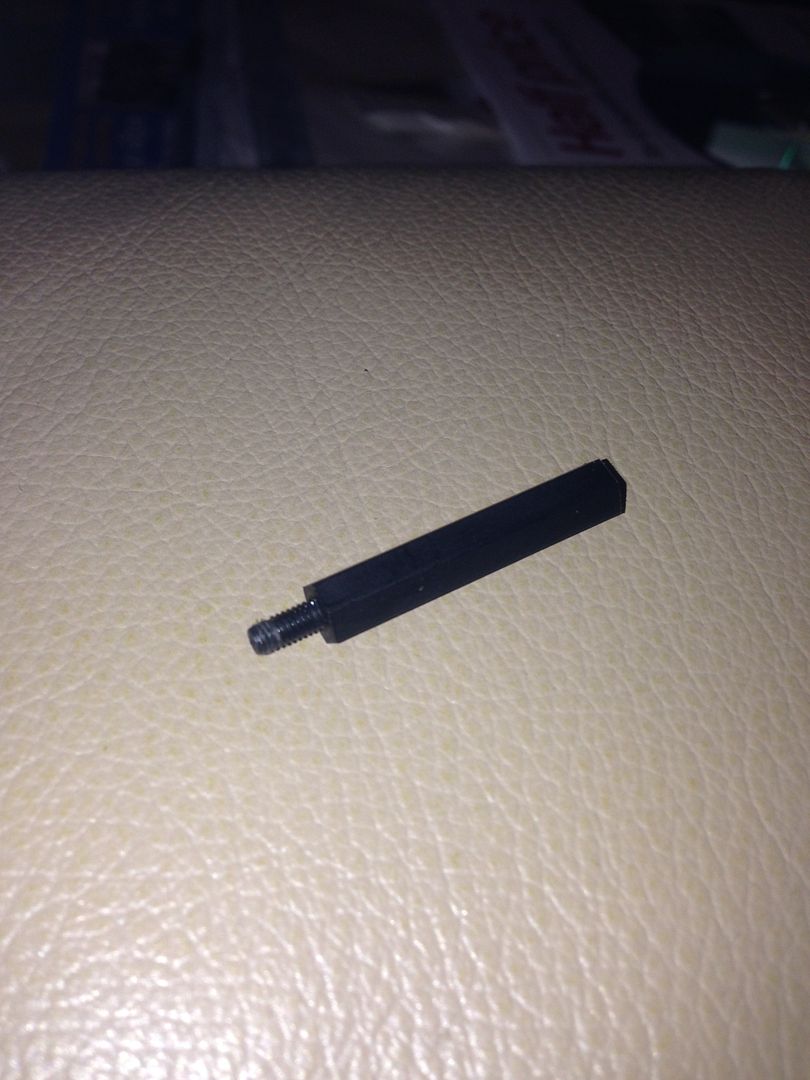
First thing I bourght on a bit of a punt were some M3 30mm male-female nylon hex spacers. The thinking would be that these replace the innermost screws on the landing legs (knowing there are nice safe brass threads into the body). £2.50 for 4 and super lightweight.
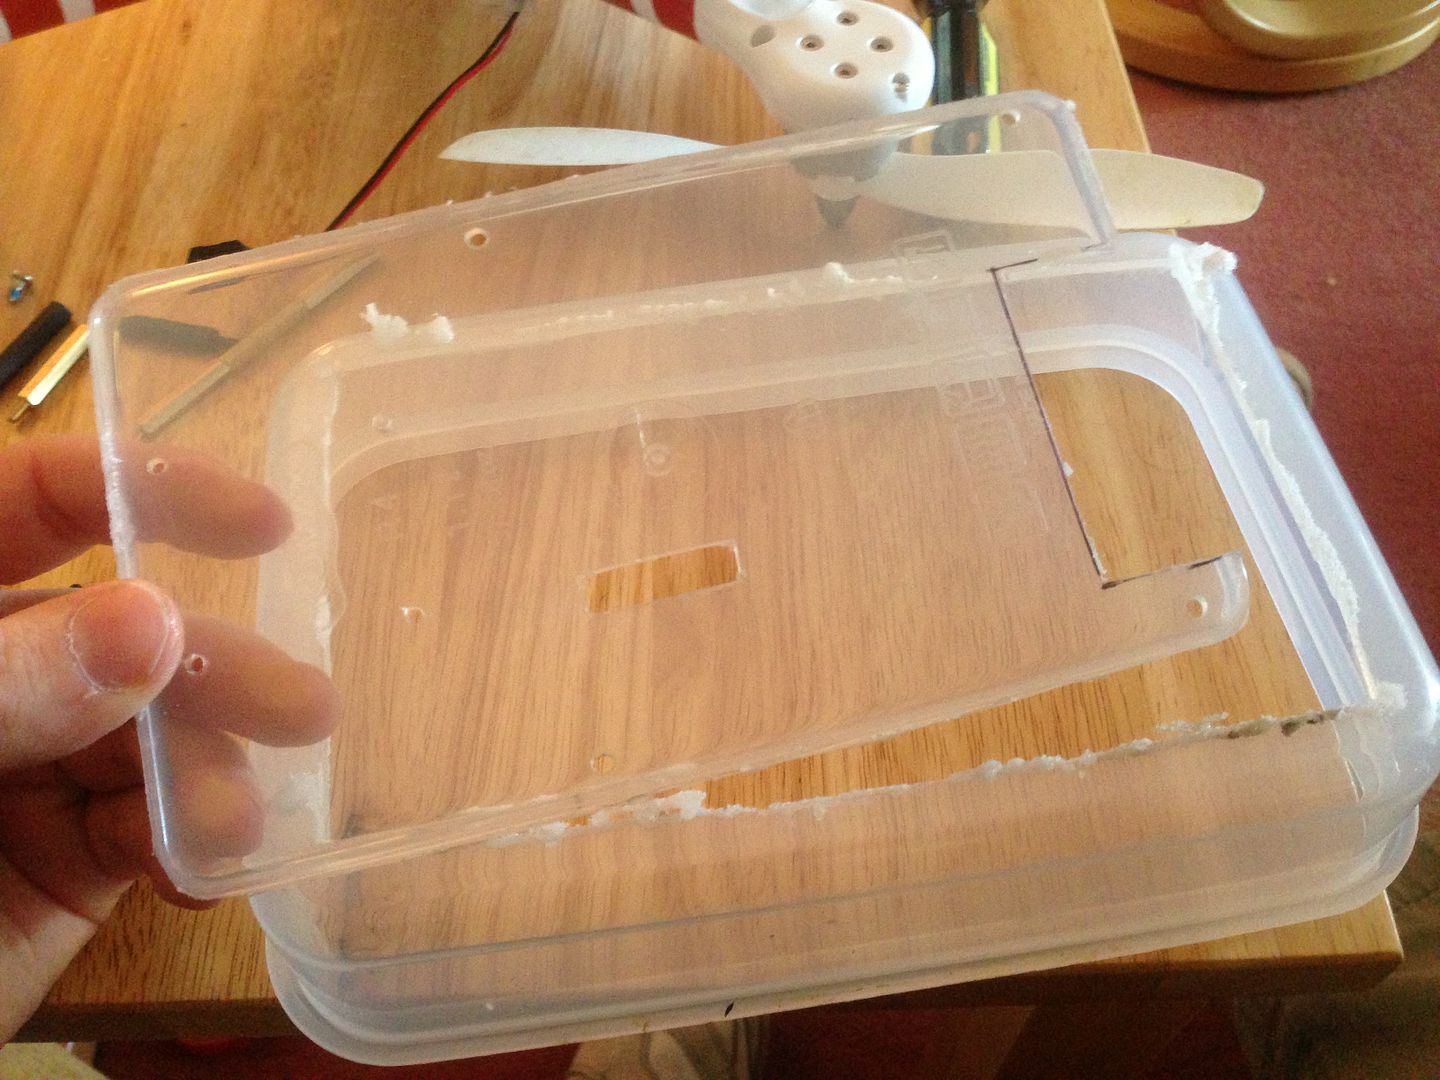
Next up was a 'tray' that would screw onto this. Carbon Fibre was the ideal solution but I am an impatient man when it comes to building stuff and having seen the spaces in place I didn't want to wait. So I looked around the garage and found an old tuppawear plastic sandwich box. Now as soon as I saw this I thought great... it is fairly light, flexes well and also its see-through so measuring for holes becomes a simple case of using a CD pen!
So this was cut to shape around the GoPro and stock mount....
First problem. The spacers are a little too high at 30mm and it means you can't undo the ally mounting screw on the GoPro mount.
Second issue and much more of a concern was the Nylon the spacers are made of. Very light but the threads themselves are made of nylon too so when tightening 2 of the threads stripped slightly. Way too risky to rely on in flight especially if a heavy gust hits the tray.
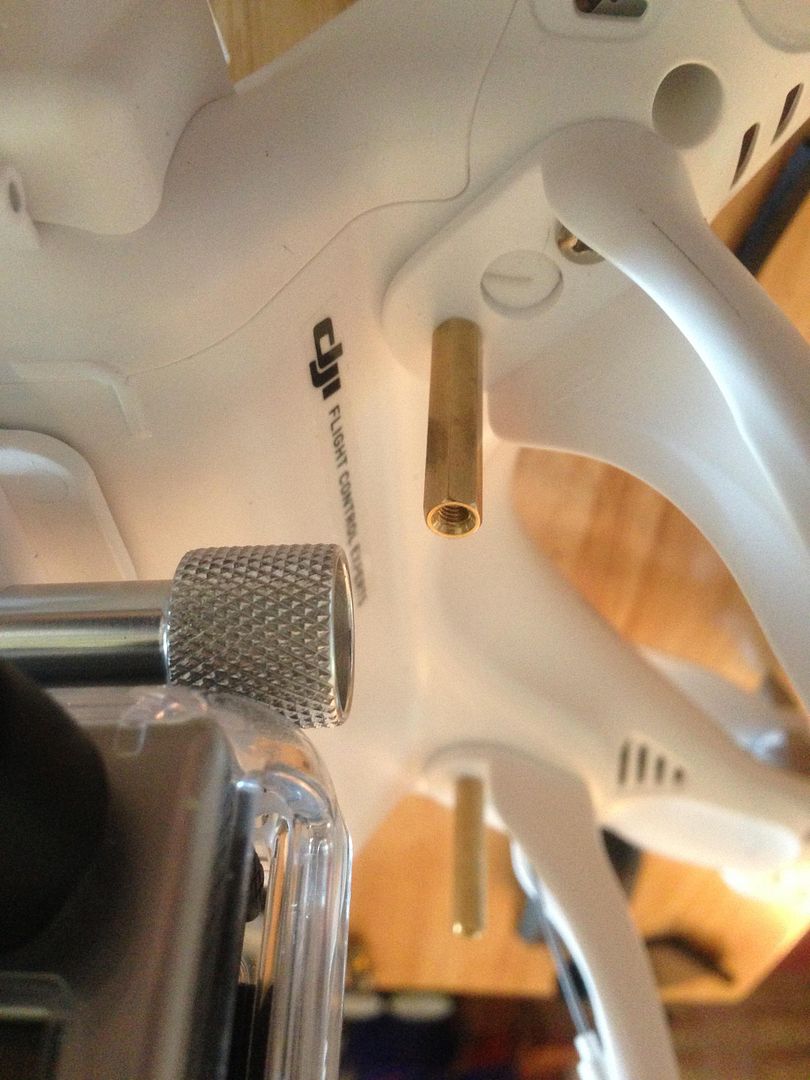
So these were dumped and replaced by 25mm versions in Brass. 12grams total weight for 4 of them so not bad really and they are all metal so no fear at all of the threads or body snapping when 'up there'.
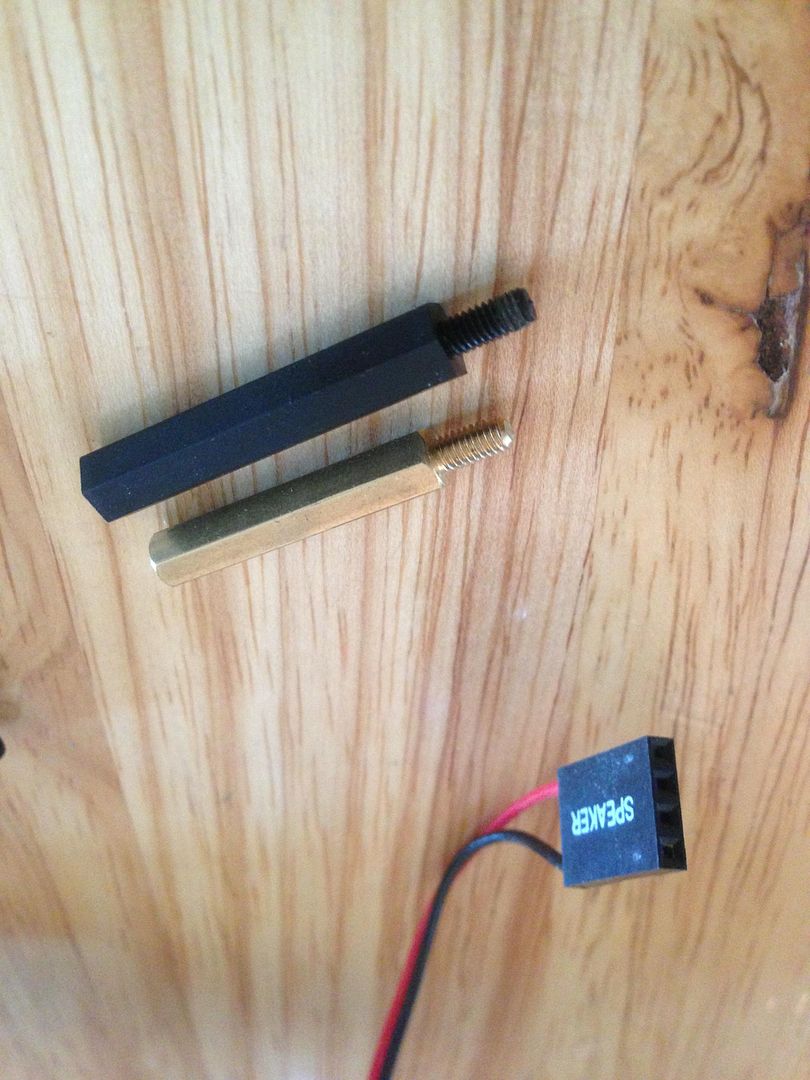
Metal spacers are a lot more secure and will eventually have a spot of thread lock.
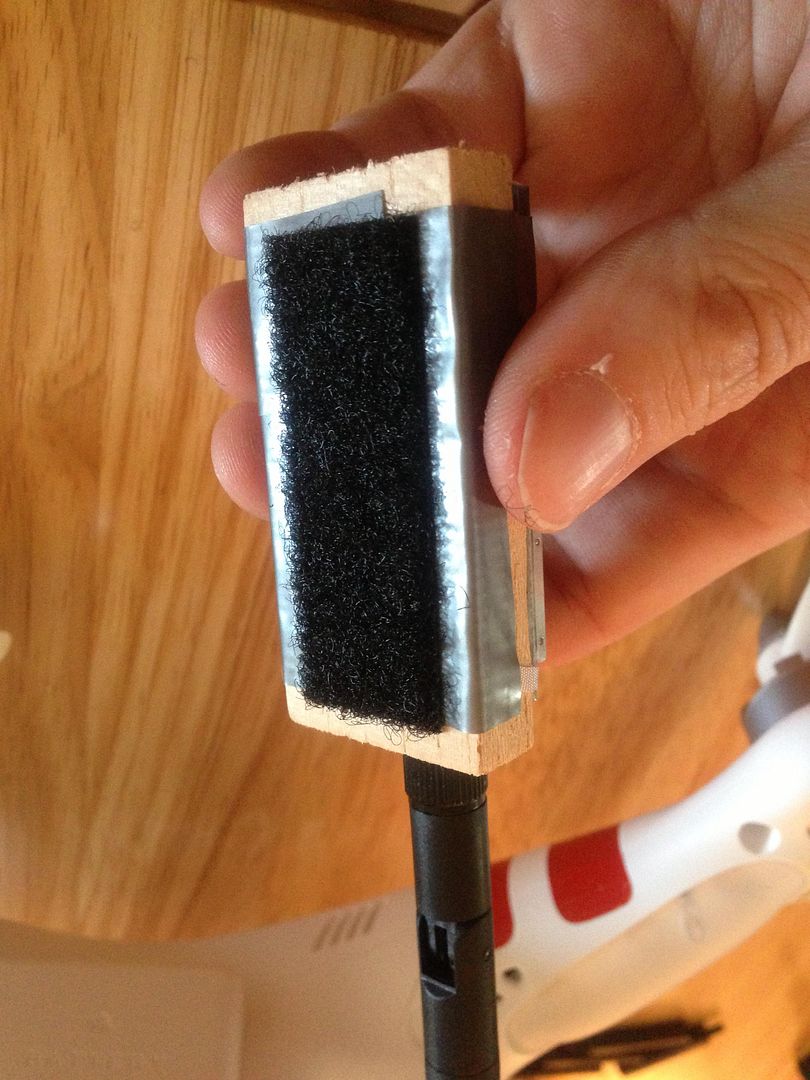
Next mod was to fit the Fat Shark Predator V2 TX. Now this is a lumpy little bugger and while I know many have used just sticky velcro to mount it with no ill effects, I wanted a nice flat base.
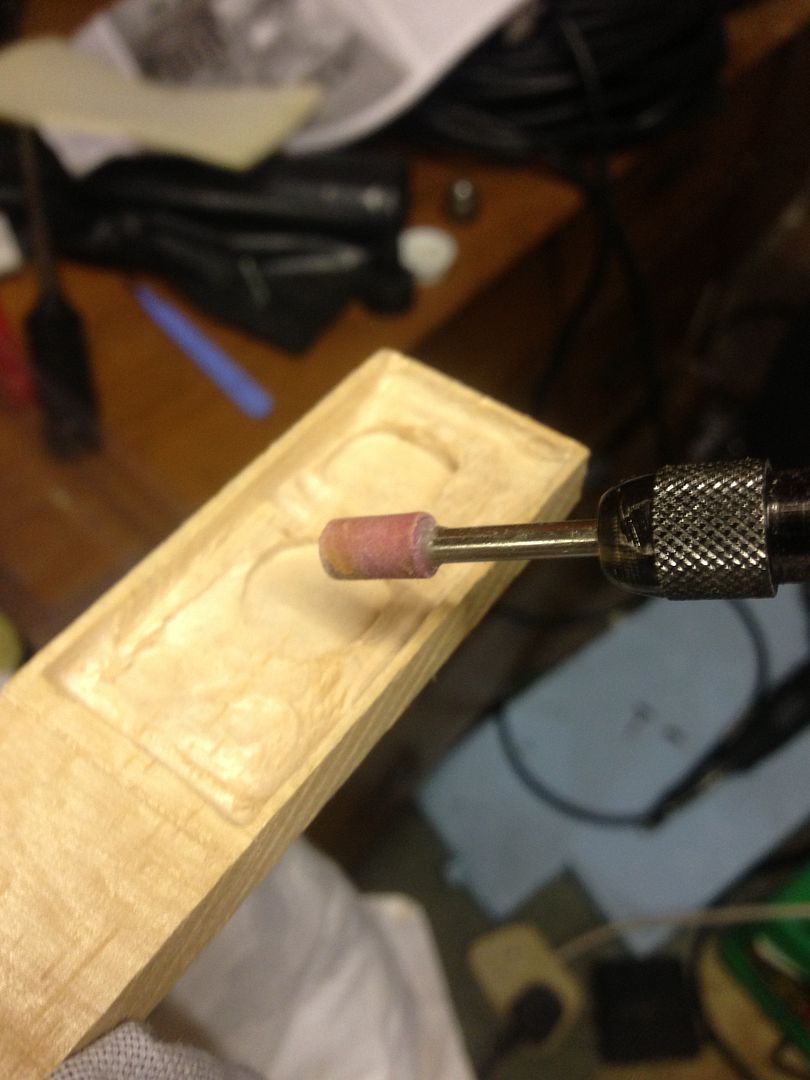
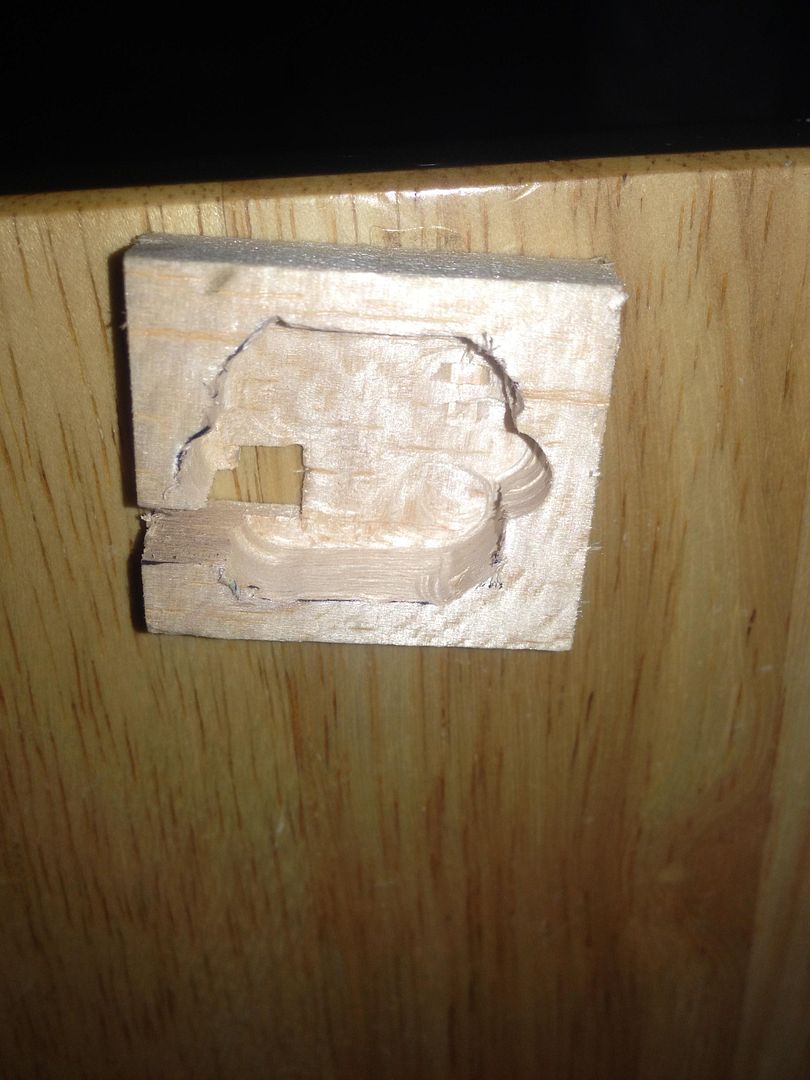
I've shown this in another thread but basically I used some balsa wood from an old canal boat model kit by late father had laying around in the garage. Calved it out with a dremel....
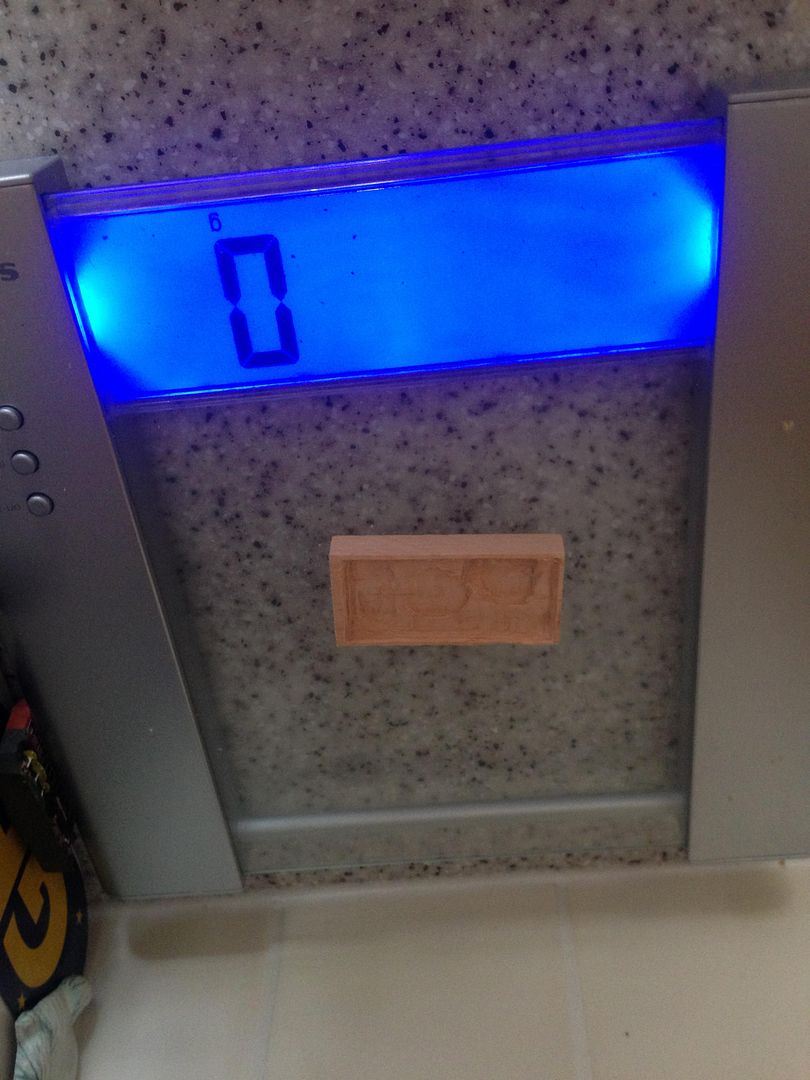
Less than a gram of weight!....
TX slots in nicely....

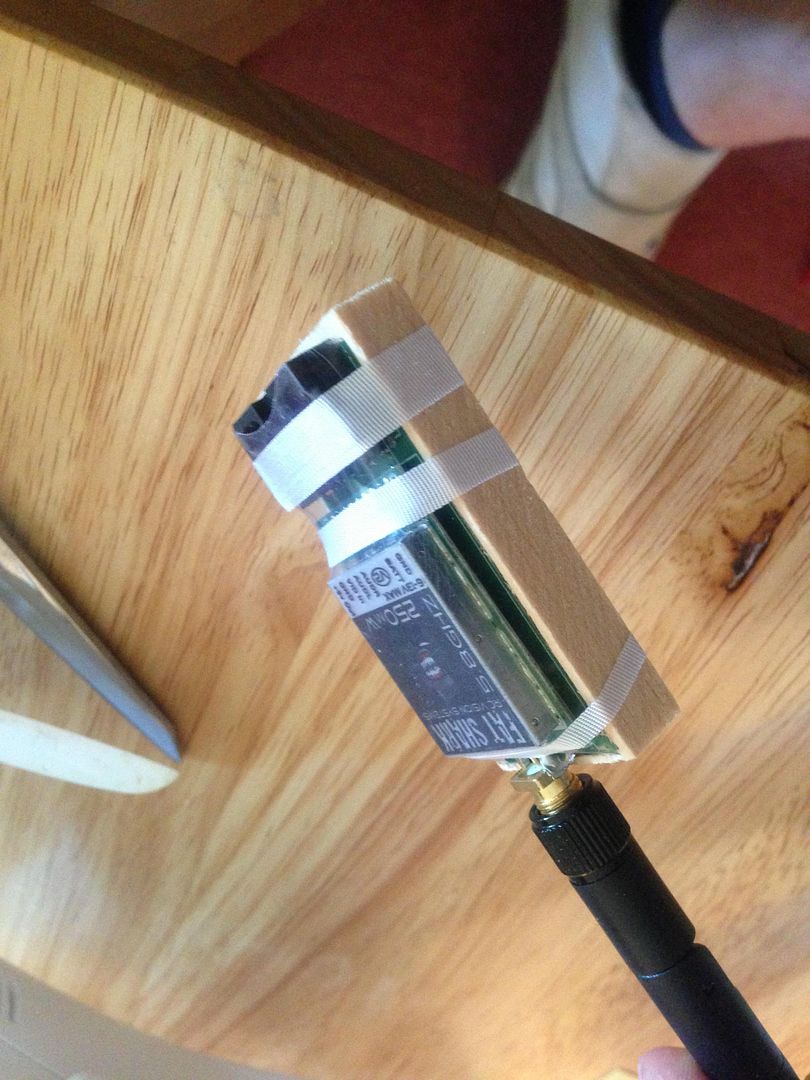
Then taped with the DJI fabric tape (avoiding covering the scorching hot TX itself)....
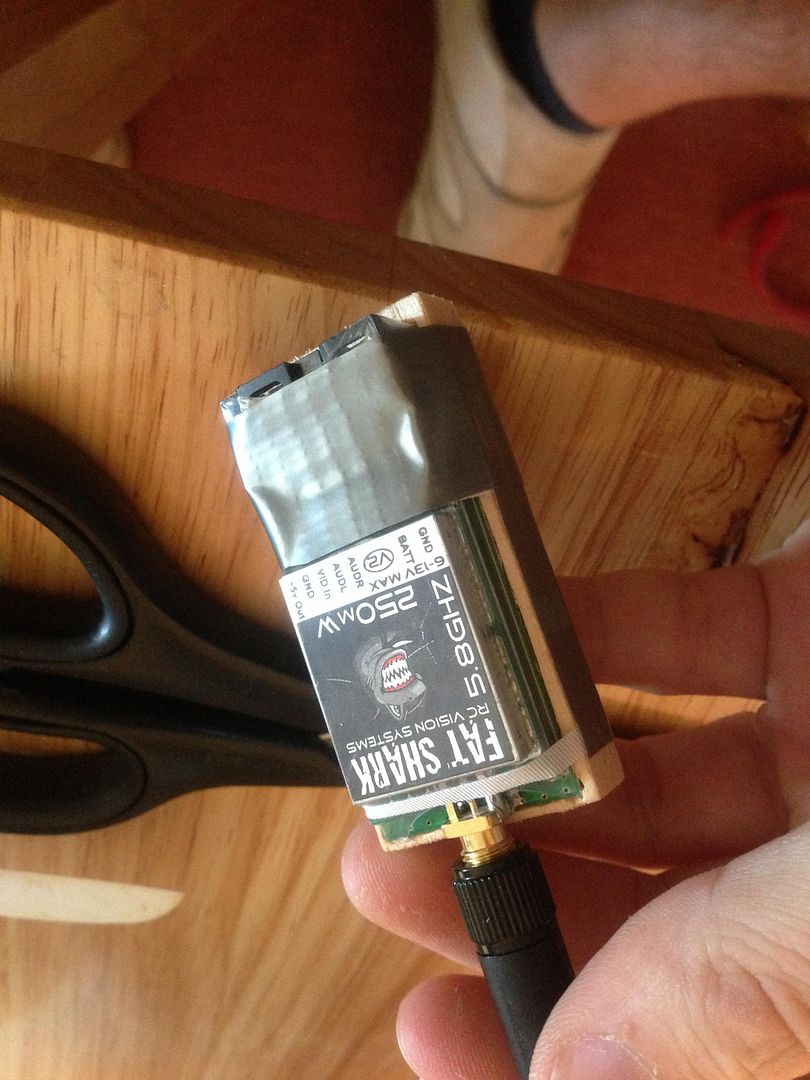
Then secured it further with ever faithful ductape to give a nice smooth 'non wooden' base...Tight and safe.
Then the velcro onto the ductape for a firm flat sticky surface.
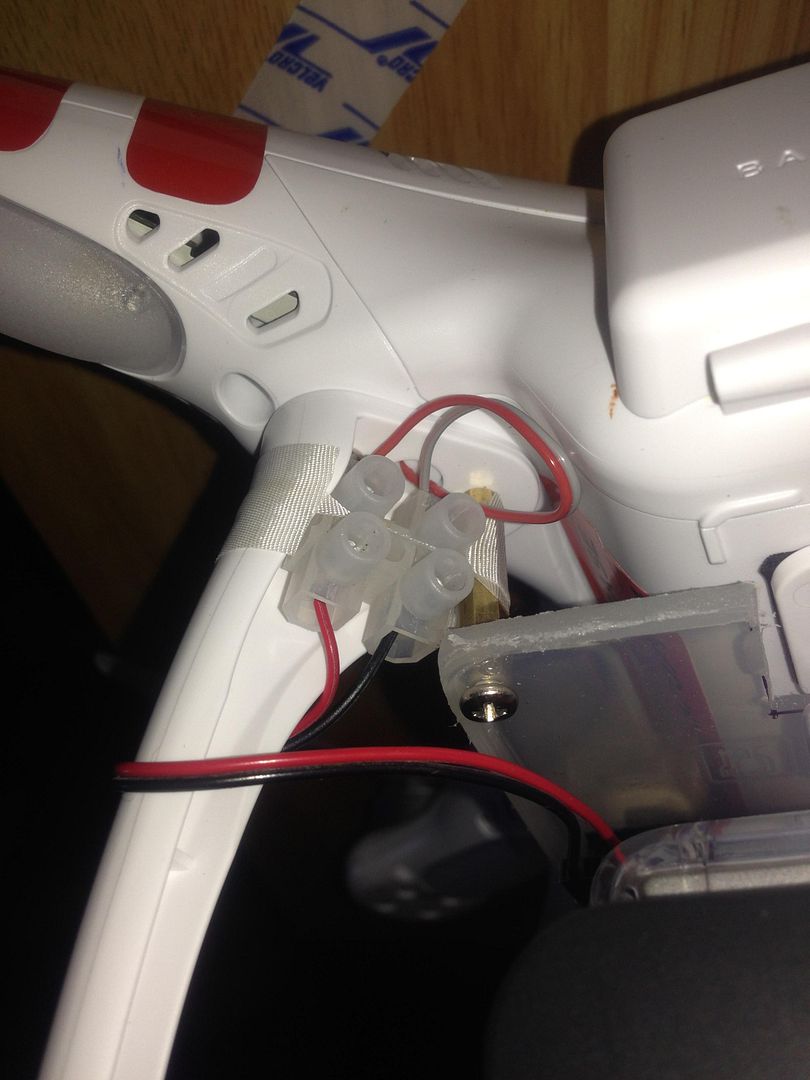
I pulled the rubber grommet from the AUX power leg (no need to open the body doing this) and then used a connecting block which I have fabric taped to the legs. This allows me to vary the use of the AUX output if I ever get a gimbal or want extra lights.
Future plans may well include a Futaba T8J so I can do some distance FPV. Problem I see is battery life is an issue for that (how far can you get in 8 mins!). This rig 'should' allow me to secure an extra battery to the underside with no problems but the weight of 2 batts ontop of Fatshark, Garmin GTU10 and protected Hero3 will put me over the 1.2kg limit. Swapping out the Hero Skeleton housing for the DJI mount will get me JUST under but to be really safe I wanted the option to take the GoPro out and use the Fatshark Predator camera. This of course won't get me great recording quality but for fun it should allow me about 12 mins (if you believe reports).
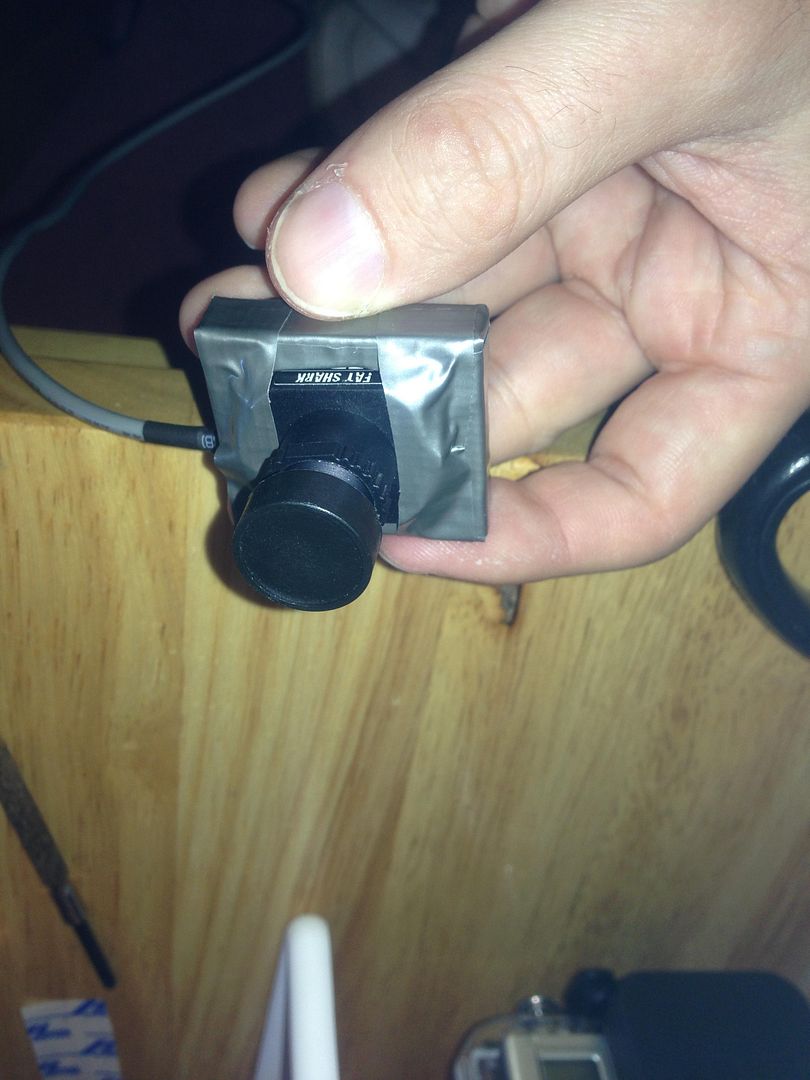
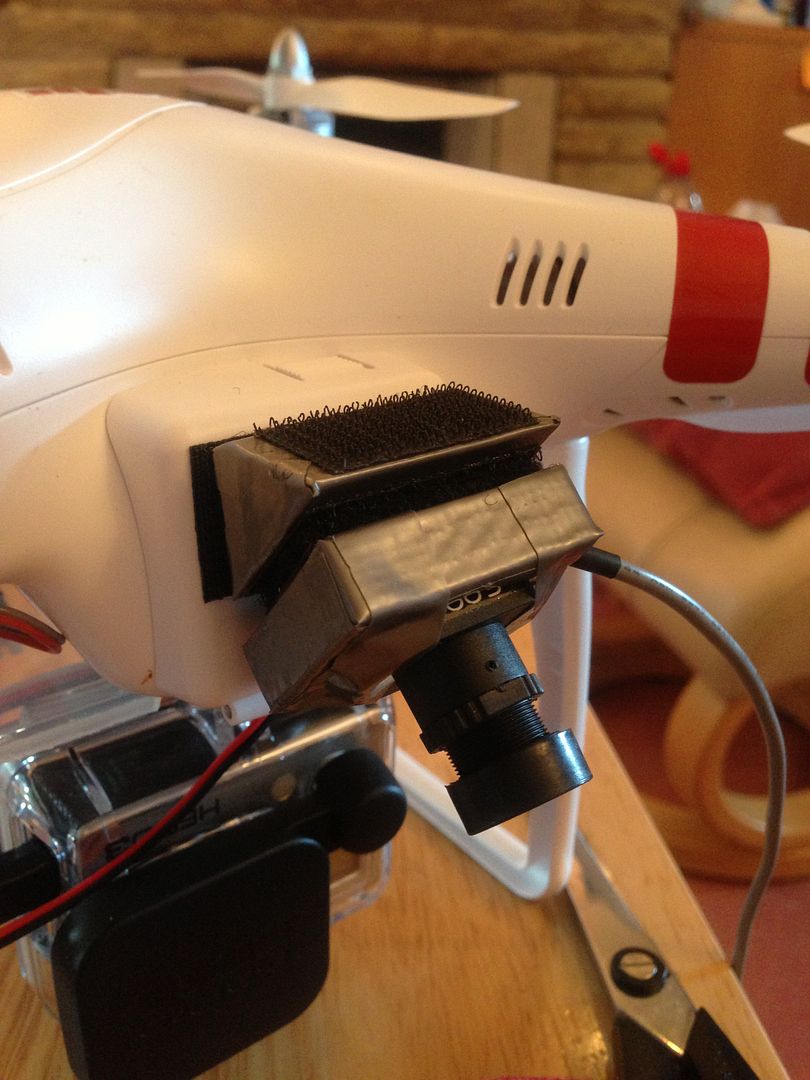
Issue with the Fatshark Cam is the same as the TX... too **** lumpy at the back! So I did the same thing and routed out some balsa....
Dressed it in Ductape...
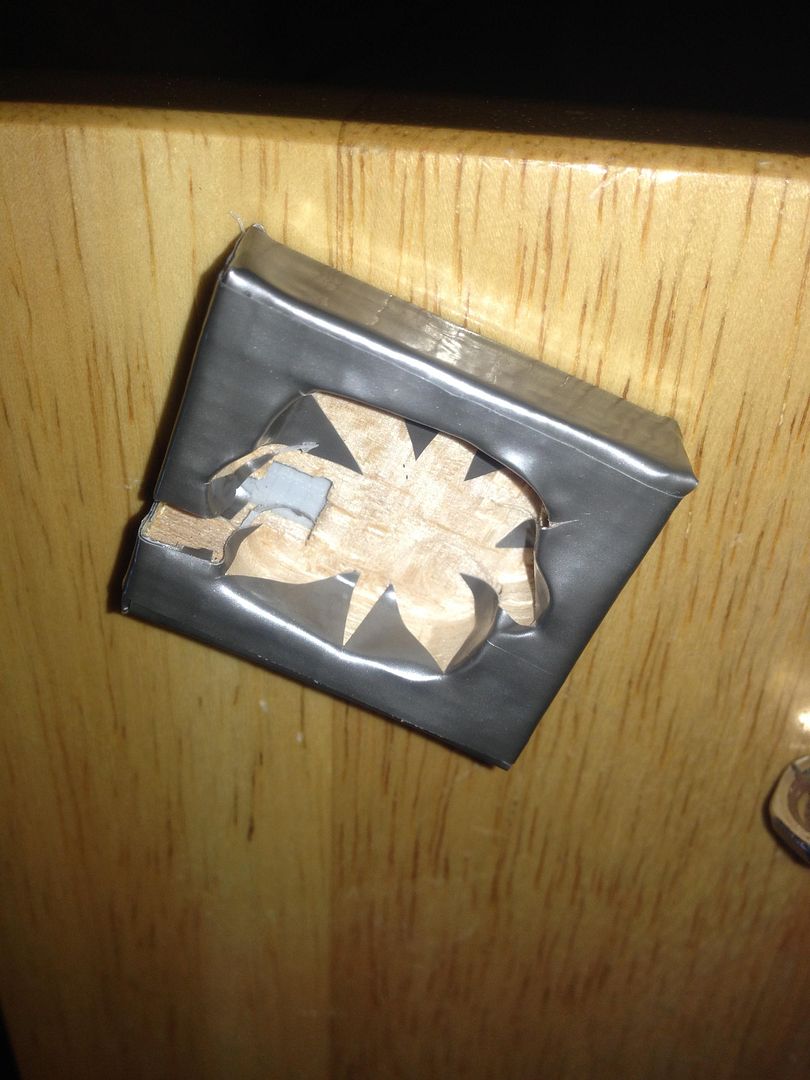
Secured the cam in its place. A nice flat, smooth back ready for a bigger surface area of velcro!
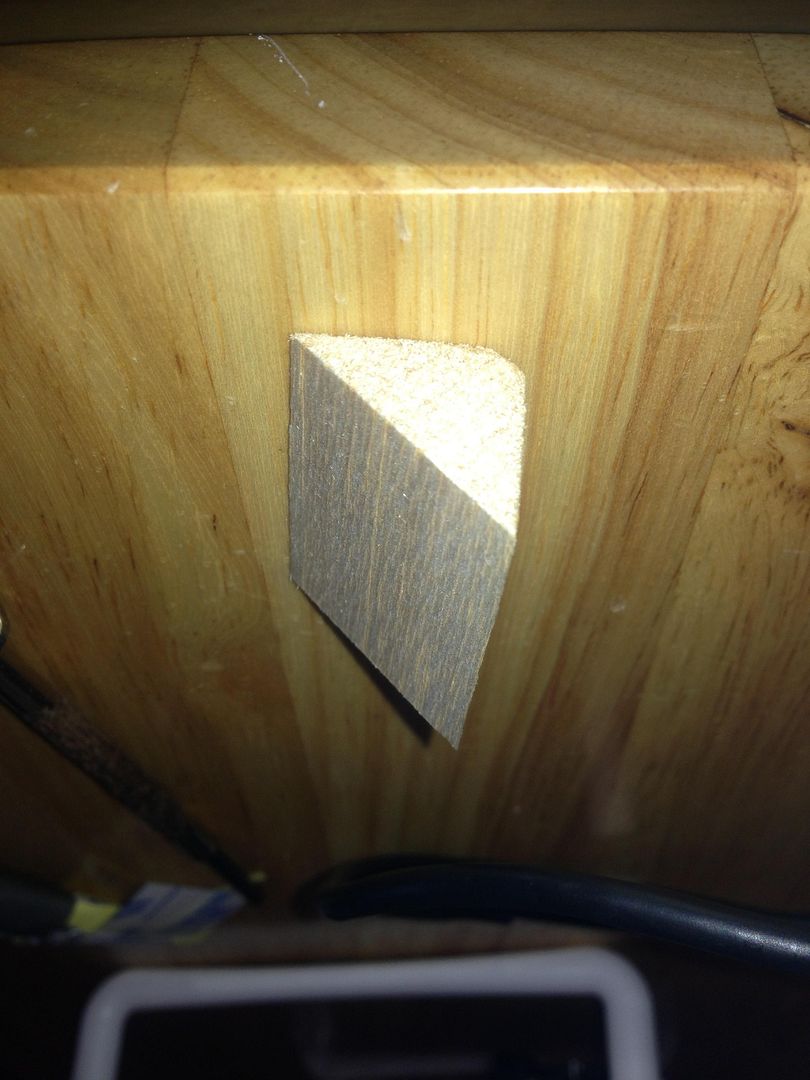
Next was mounting options for the camera. The battery cover is the obvious place for a front end mount but sitting flush the camera will point up. Not the end of the world but the option to look down would be good. Out comes the balsa again (the top of the canal boat model it would seem!)...
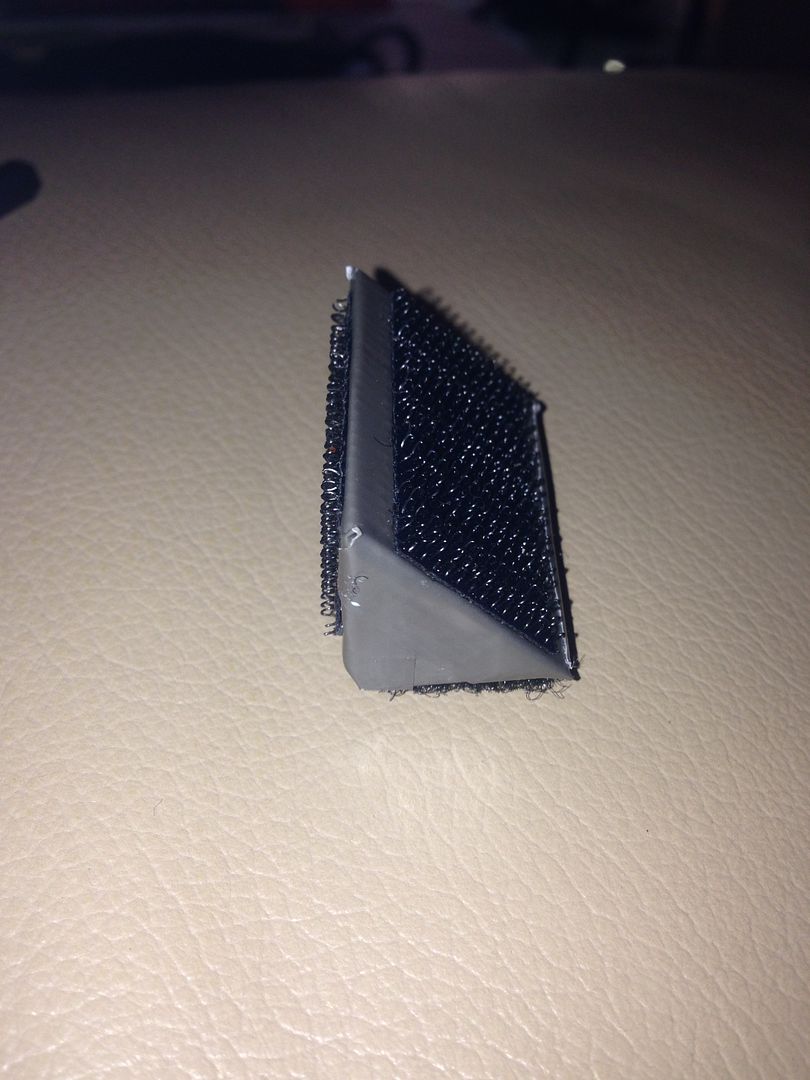
Wrapped with tape and velcro'd up....
The results?.... A 'straight forward' option (using the velcro to dampen it and point it down slightly).
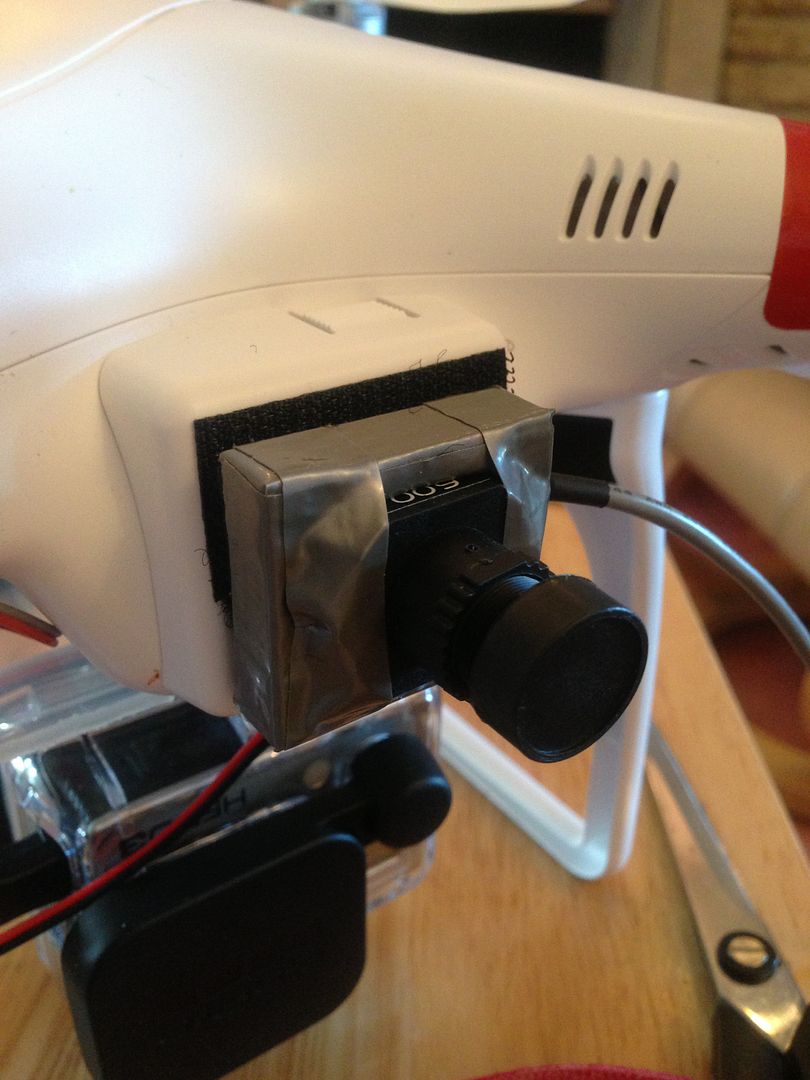
A 45 degree downward looking option....
Come Monday I should receive an A4 sheet of 2mm rigid carbon so I can then use the plastic rig as a template and loose a bit more weight (and make it look posh too!). Sadly a little too windy at the moment for a decent test but maybe tomorrow.
I know its not exactly rocket science and I've seen plenty of other peoples mods that both look better and function as good but I thought I'd share this just to show what can be done for very little indeed.
So this is what I did to get a bit more real-estate to use for FPV and/Or battery.
First thing I bourght on a bit of a punt were some M3 30mm male-female nylon hex spacers. The thinking would be that these replace the innermost screws on the landing legs (knowing there are nice safe brass threads into the body). £2.50 for 4 and super lightweight.

Next up was a 'tray' that would screw onto this. Carbon Fibre was the ideal solution but I am an impatient man when it comes to building stuff and having seen the spaces in place I didn't want to wait. So I looked around the garage and found an old tuppawear plastic sandwich box. Now as soon as I saw this I thought great... it is fairly light, flexes well and also its see-through so measuring for holes becomes a simple case of using a CD pen!
So this was cut to shape around the GoPro and stock mount....

First problem. The spacers are a little too high at 30mm and it means you can't undo the ally mounting screw on the GoPro mount.
Second issue and much more of a concern was the Nylon the spacers are made of. Very light but the threads themselves are made of nylon too so when tightening 2 of the threads stripped slightly. Way too risky to rely on in flight especially if a heavy gust hits the tray.
So these were dumped and replaced by 25mm versions in Brass. 12grams total weight for 4 of them so not bad really and they are all metal so no fear at all of the threads or body snapping when 'up there'.

Metal spacers are a lot more secure and will eventually have a spot of thread lock.

Next mod was to fit the Fat Shark Predator V2 TX. Now this is a lumpy little bugger and while I know many have used just sticky velcro to mount it with no ill effects, I wanted a nice flat base.
I've shown this in another thread but basically I used some balsa wood from an old canal boat model kit by late father had laying around in the garage. Calved it out with a dremel....

Less than a gram of weight!....

TX slots in nicely....

Then taped with the DJI fabric tape (avoiding covering the scorching hot TX itself)....

Then secured it further with ever faithful ductape to give a nice smooth 'non wooden' base...Tight and safe.

Then the velcro onto the ductape for a firm flat sticky surface.

I pulled the rubber grommet from the AUX power leg (no need to open the body doing this) and then used a connecting block which I have fabric taped to the legs. This allows me to vary the use of the AUX output if I ever get a gimbal or want extra lights.

Future plans may well include a Futaba T8J so I can do some distance FPV. Problem I see is battery life is an issue for that (how far can you get in 8 mins!). This rig 'should' allow me to secure an extra battery to the underside with no problems but the weight of 2 batts ontop of Fatshark, Garmin GTU10 and protected Hero3 will put me over the 1.2kg limit. Swapping out the Hero Skeleton housing for the DJI mount will get me JUST under but to be really safe I wanted the option to take the GoPro out and use the Fatshark Predator camera. This of course won't get me great recording quality but for fun it should allow me about 12 mins (if you believe reports).
Issue with the Fatshark Cam is the same as the TX... too **** lumpy at the back! So I did the same thing and routed out some balsa....

Dressed it in Ductape...

Secured the cam in its place. A nice flat, smooth back ready for a bigger surface area of velcro!

Next was mounting options for the camera. The battery cover is the obvious place for a front end mount but sitting flush the camera will point up. Not the end of the world but the option to look down would be good. Out comes the balsa again (the top of the canal boat model it would seem!)...

Wrapped with tape and velcro'd up....

The results?.... A 'straight forward' option (using the velcro to dampen it and point it down slightly).

A 45 degree downward looking option....

Come Monday I should receive an A4 sheet of 2mm rigid carbon so I can then use the plastic rig as a template and loose a bit more weight (and make it look posh too!). Sadly a little too windy at the moment for a decent test but maybe tomorrow.
I know its not exactly rocket science and I've seen plenty of other peoples mods that both look better and function as good but I thought I'd share this just to show what can be done for very little indeed.
")


