

Here I go again with one of my pain in the *** mods 
The Task at Hand
#1) Get more flight time....
#2) Don't mess up the look of the Phantom...
#3) Don't add more weight....
#4) Don't f@#% this up!!! :|
Research first...
Find a battery with more power... sized fairly decent to still squeeze in the battery bay... and not too heavy...
Ended up with this 6600mAh deal that was made for the Blade QR-X350 Pro ... measurements looked ok... weight looked good...
Took the plunge and ordered a couple.... http://r.ebay.com/Y3q984
Next thing... was to tear apart a DJI Battery and figure out the wiring specifics...
That wasn't so bad... shoulda waited till the other batteries showed up from China... Ended up stuck with just one battery for a couple weeks there
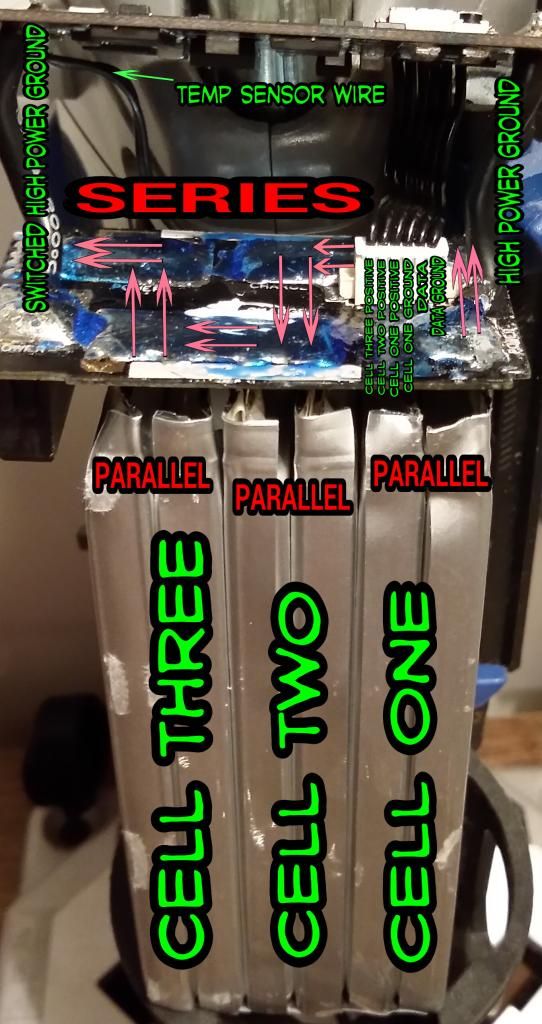
The battery is pretty straight forward... Two PC boards... top one is the smart one doing all the work... bottom one is just a router bringing all the cells together and sending power and data to the quick connectors... A simple six wire flat cable uses four wires for balance leads and two wires to send data to the infamous spring pads on the battery quick connect hub... The two fat black wires are the switched negative to turn the Phantom on and off... Positive is always connected when the battery is installed...
My plan was to ditch all that "quick connect spring pin ****" ... and go with solid Deans Connectors and solder data wires direct ... I wanted solid... I wanted dependable... and I wanted MORE :twisted:
Snip Snip Clip Clip....
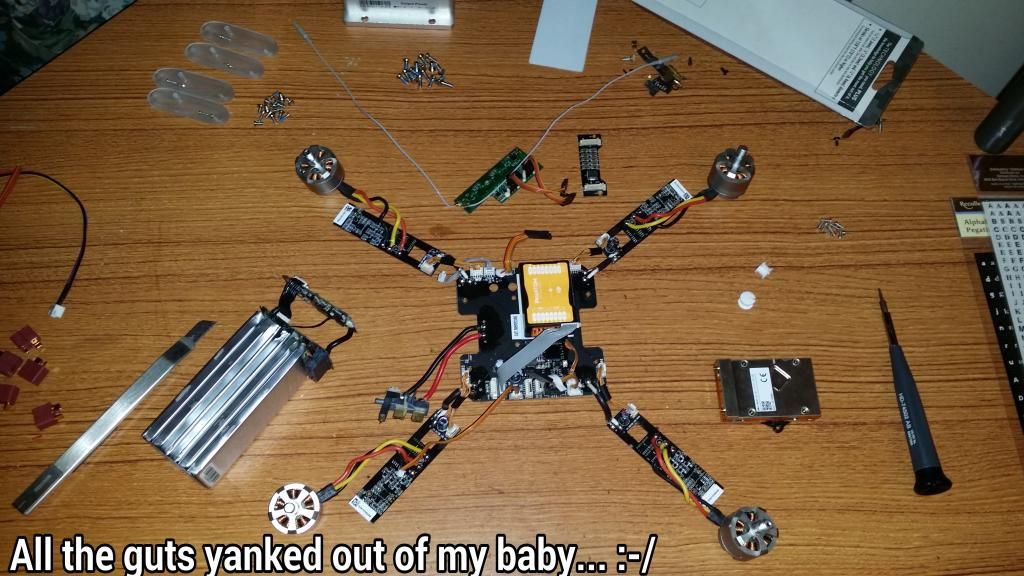
Got the main smart board removed from the battery and started working out a location for permanent mounting... This required a complete teardown... didn't really wanna do it... but then again... wanted to do it right... so there it went... gutted that baby
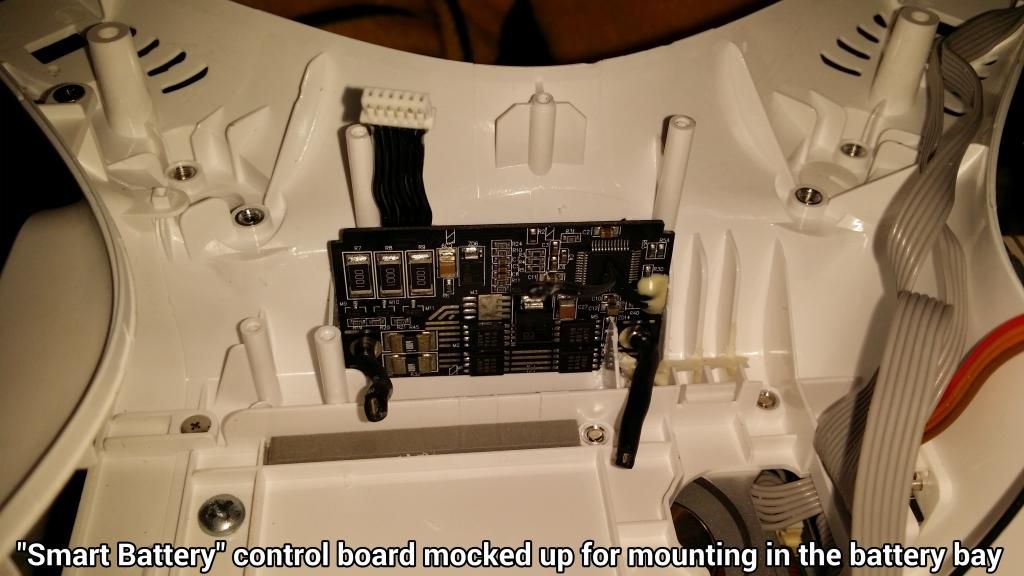
Inside the battery bay I found a good spot...
For my long range setup I have moved the stock DJI antennas outside the hull anyway... boom... done ... snipped out some plastic ribs that held the antenna and it fits like a charm... weird... like it belongs there")
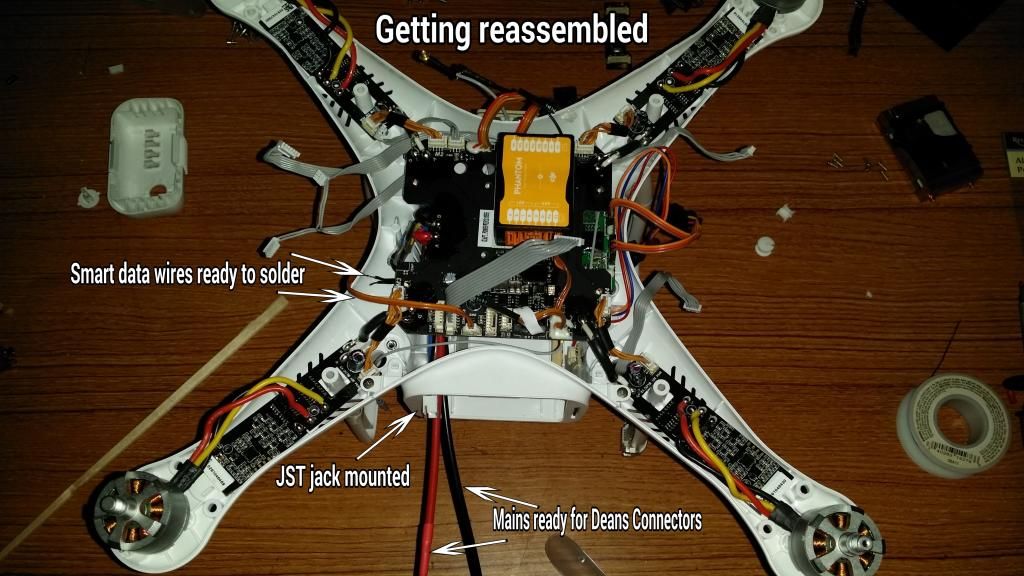
Got it all cemented in place and JST connector soldered and shrunk to the 4 "smart wires"...
ground main soldered and shrunk and layed out...

Moving on...
With that I could start reassembly ... solder in positive main... solder in negative switched main... solder and shrink data wires...
And start finishing things up with this little bad boy....
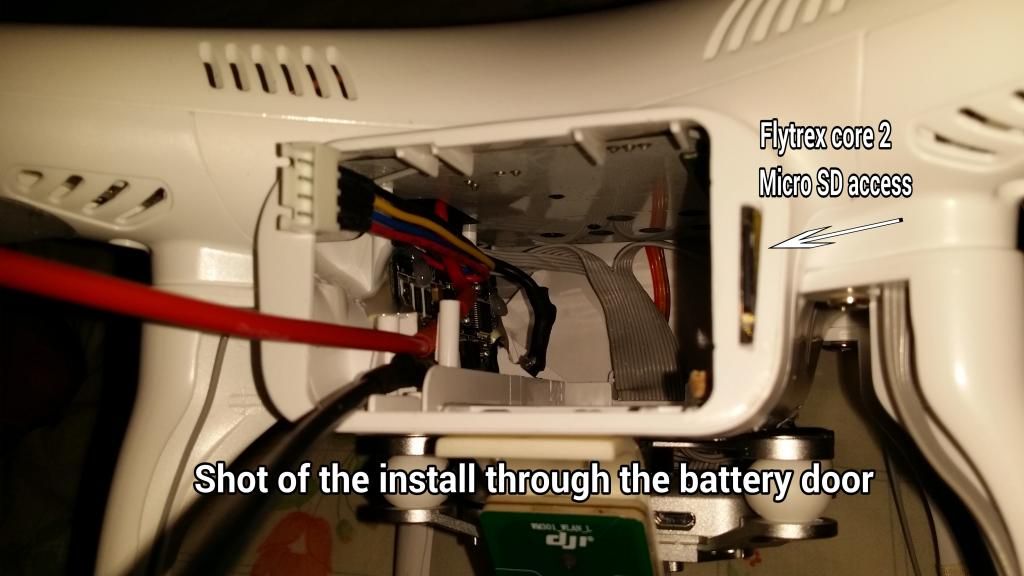
View from the battery door shows why I wanted to hide all this crap...
Next was cleanup...
Solder and shrink Deans Connectors... Hollow out battery cover and glue power button back in place for that "stock" look...
Contact cement and some shaped EPP foam to make the battery sit tight in the bay...
Slide a battery in the bay and plug everything in and cross my fingers...
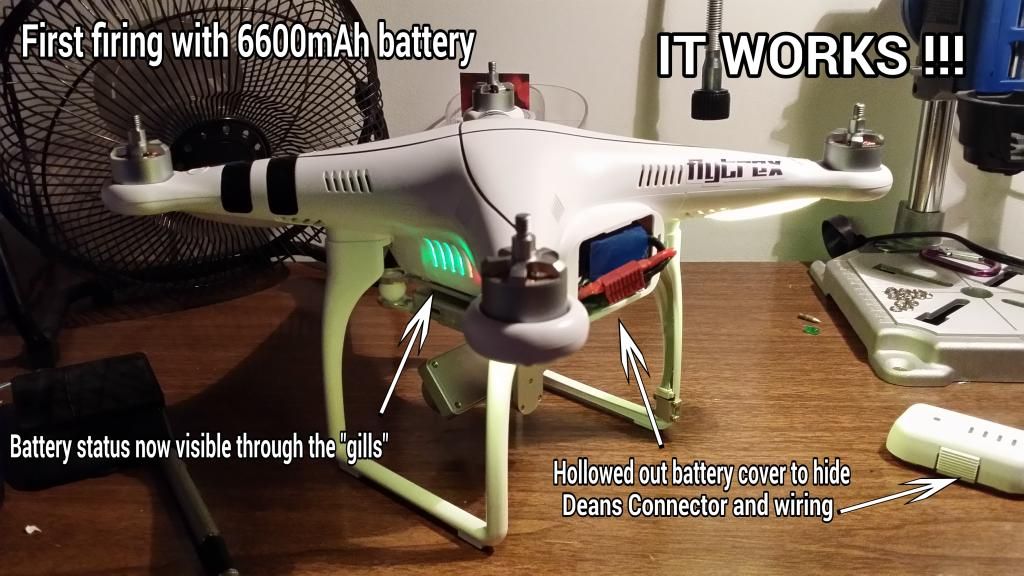
pro-tip ... always plug the mains in first... then the JST connector
And That's a Wrap...
Snap things together and wait for decent weather to test fly...
(which happened tonight btw... Screenshot at bottom of post)
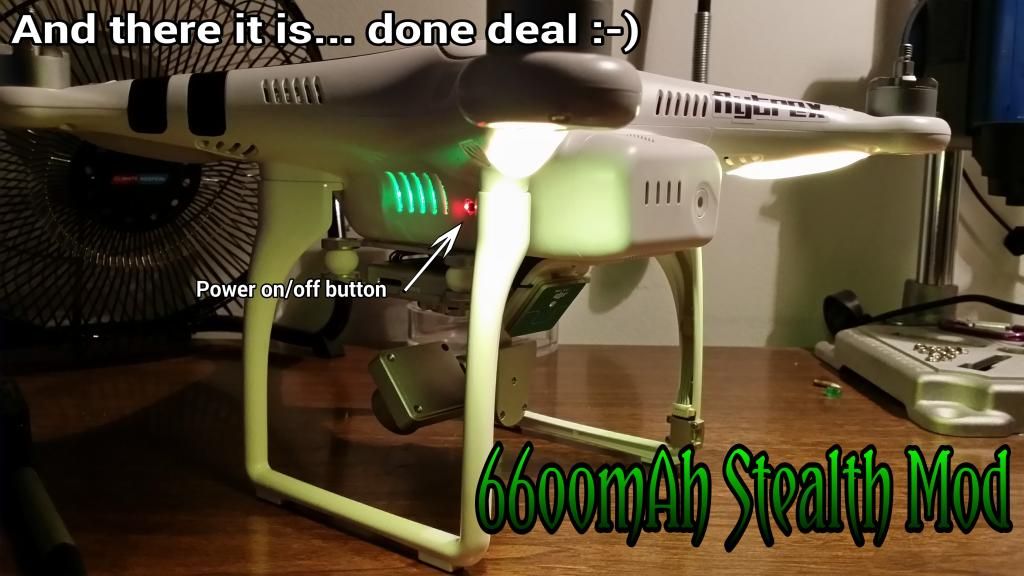
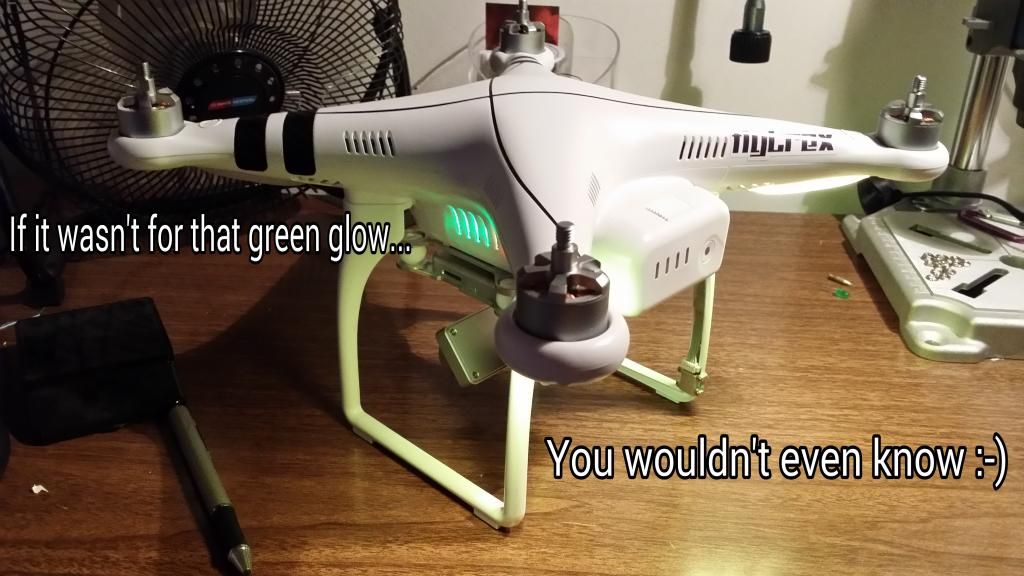
And you can't even tell it's there...
First test...
First charge on this battery...
First flight jitters hoping it would work out ok....
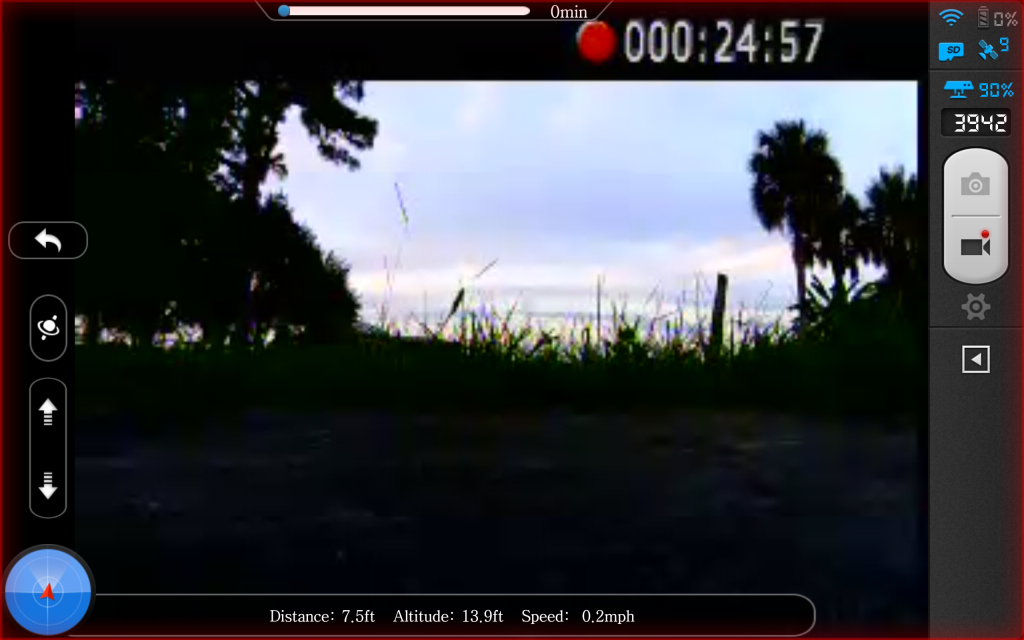
Just landed a little while ago and snapped a Screenshot... started video record right after I took off and Screenshot right after I landed so this is pretty **** accurate... and I didn't baby the thing and just hover the whole time... I flew around quite a bit and it was pretty breezy as well... I mean, I wasn't hammering it the whole time but I'm totally stoked with this... it was still light out when I launched this baby!! :twisted:
I figure this will get a bit better too... you know how Lipos are on a first date ... After a few charges and cycles we'll see how she settles in and get a good average of airtime...
.
.
Now **** gets real... going for a new distance record and this battery setup will get me there...
How far can YOU fly???
.
.
.
The Task at Hand
#1) Get more flight time....
#2) Don't mess up the look of the Phantom...
#3) Don't add more weight....
#4) Don't f@#% this up!!! :|
Research first...
Find a battery with more power... sized fairly decent to still squeeze in the battery bay... and not too heavy...
Ended up with this 6600mAh deal that was made for the Blade QR-X350 Pro ... measurements looked ok... weight looked good...
Took the plunge and ordered a couple.... http://r.ebay.com/Y3q984
Next thing... was to tear apart a DJI Battery and figure out the wiring specifics...
That wasn't so bad... shoulda waited till the other batteries showed up from China... Ended up stuck with just one battery for a couple weeks there
The battery is pretty straight forward... Two PC boards... top one is the smart one doing all the work... bottom one is just a router bringing all the cells together and sending power and data to the quick connectors... A simple six wire flat cable uses four wires for balance leads and two wires to send data to the infamous spring pads on the battery quick connect hub... The two fat black wires are the switched negative to turn the Phantom on and off... Positive is always connected when the battery is installed...
My plan was to ditch all that "quick connect spring pin ****" ... and go with solid Deans Connectors and solder data wires direct ... I wanted solid... I wanted dependable... and I wanted MORE :twisted:
Snip Snip Clip Clip....
Got the main smart board removed from the battery and started working out a location for permanent mounting... This required a complete teardown... didn't really wanna do it... but then again... wanted to do it right... so there it went... gutted that baby
Inside the battery bay I found a good spot...
For my long range setup I have moved the stock DJI antennas outside the hull anyway... boom... done ... snipped out some plastic ribs that held the antenna and it fits like a charm... weird... like it belongs there
Got it all cemented in place and JST connector soldered and shrunk to the 4 "smart wires"...
ground main soldered and shrunk and layed out...
Moving on...
With that I could start reassembly ... solder in positive main... solder in negative switched main... solder and shrink data wires...
And start finishing things up with this little bad boy....
View from the battery door shows why I wanted to hide all this crap...
Next was cleanup...
Solder and shrink Deans Connectors... Hollow out battery cover and glue power button back in place for that "stock" look...
Contact cement and some shaped EPP foam to make the battery sit tight in the bay...
Slide a battery in the bay and plug everything in and cross my fingers...
pro-tip ... always plug the mains in first... then the JST connector
And That's a Wrap...
Snap things together and wait for decent weather to test fly...
(which happened tonight btw... Screenshot at bottom of post)
And you can't even tell it's there...
First test...
First charge on this battery...
First flight jitters hoping it would work out ok....
Just landed a little while ago and snapped a Screenshot... started video record right after I took off and Screenshot right after I landed so this is pretty **** accurate... and I didn't baby the thing and just hover the whole time... I flew around quite a bit and it was pretty breezy as well... I mean, I wasn't hammering it the whole time but I'm totally stoked with this... it was still light out when I launched this baby!! :twisted:
I figure this will get a bit better too... you know how Lipos are on a first date
... After a few charges and cycles we'll see how she settles in and get a good average of airtime... .
.
Now **** gets real... going for a new distance record and this battery setup will get me there...
How far can YOU fly???
.
.
.

") The things you've found and come up with on this bird, even more impressive. Nice work! Thanks for the details!
The things you've found and come up with on this bird, even more impressive. Nice work! Thanks for the details!
")


