Inspired by Hugh, our archaeologist poster, who mounted a Canon point & shoot camera I thought I have a go at doing similar.
The first thing I did was purchase a Canon IXUS 125HS camera off Ebay. With a total weight of 125gr it wouldn’t be too heavy.
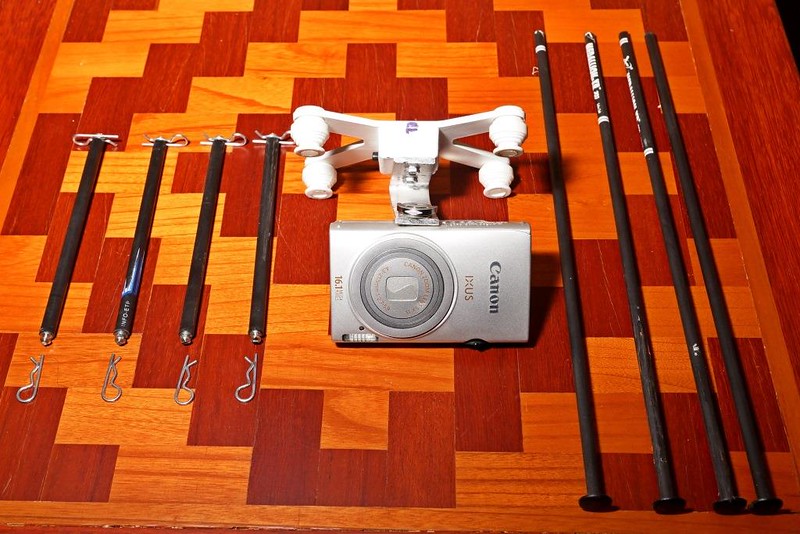
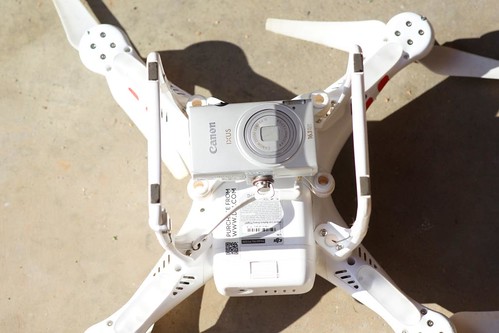
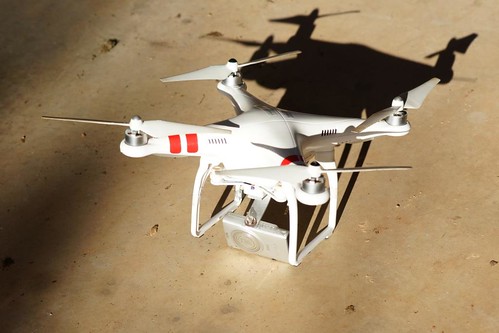
The next thing I did was to spend about half a day learning how to do a CHDK so the camera shutter would activate every 4 seconds or so. Much to my surprise I actually managed to do this so I then purchased an Upper Damping Bracket, which is a standard DJI spare part, costing about $14.00au. This gave me enough to make 2 mounts so I decided to make both 40 degree & 90 degree brackets. Using some aluminium strip I bent it to the appropriate angles and secured it to the damper brackets with small bolts. The camera was secured using a ¼’ tripod bolt.
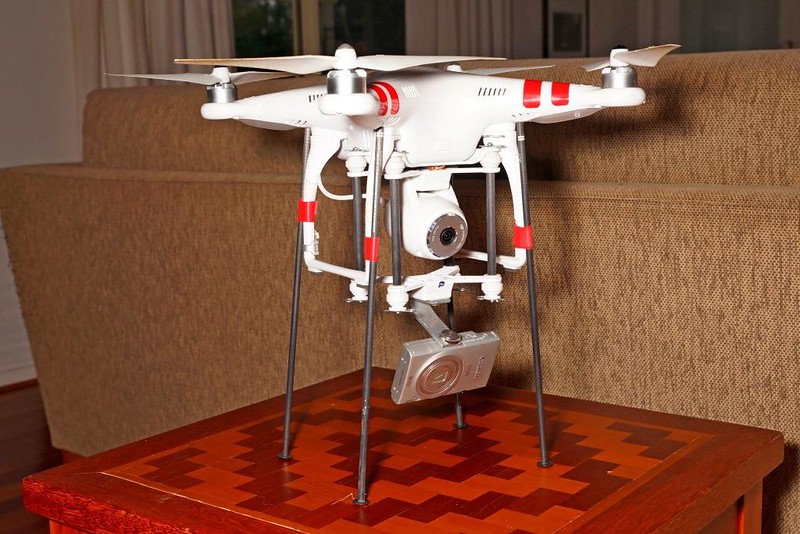
It’s not perfect. On the 45 degree mount the camera extends slightly below the landing gear so I have to hand catch. I know I could get extended landing gear but then it won’t fit in its case. Also, because the camera is upside down you have to reverse the photos but that’s pretty easy. Using Windows Explorer it only takes 2 mouse clicks to rotate the whole batch.
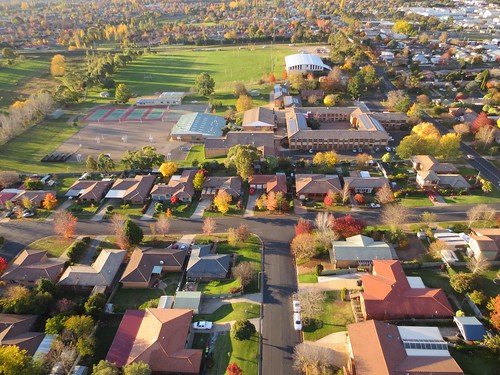
I guess the biggest loss is no FPV which is a pretty big negative but all in all I’m pretty pleased with the result and there’s no FISH EYE!
Here’s some photos.
Damper brackets with the aluminium mounts
 . by linecutter, on Flickr
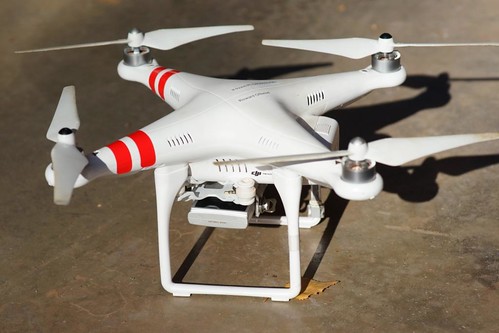
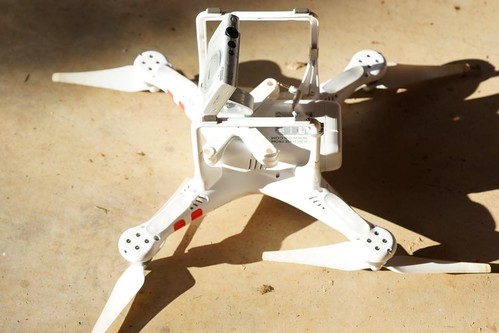
90 degree mount
 . by linecutter, on Flickr
 . by linecutter, on Flickr
45 degree mount
 . by linecutter, on Flickr
 . by linecutter, on Flickr
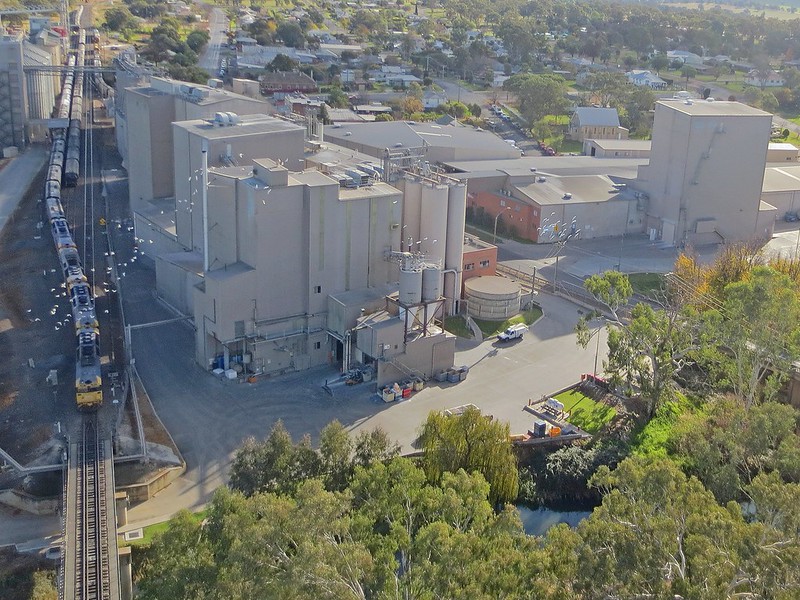
The result
 IMG_2092 by linecutter, on Flickr
 IMG_2008 by linecutter, on Flickr
The first thing I did was purchase a Canon IXUS 125HS camera off Ebay. With a total weight of 125gr it wouldn’t be too heavy.
The next thing I did was to spend about half a day learning how to do a CHDK so the camera shutter would activate every 4 seconds or so. Much to my surprise I actually managed to do this so I then purchased an Upper Damping Bracket, which is a standard DJI spare part, costing about $14.00au. This gave me enough to make 2 mounts so I decided to make both 40 degree & 90 degree brackets. Using some aluminium strip I bent it to the appropriate angles and secured it to the damper brackets with small bolts. The camera was secured using a ¼’ tripod bolt.
It’s not perfect. On the 45 degree mount the camera extends slightly below the landing gear so I have to hand catch. I know I could get extended landing gear but then it won’t fit in its case. Also, because the camera is upside down you have to reverse the photos but that’s pretty easy. Using Windows Explorer it only takes 2 mouse clicks to rotate the whole batch.
I guess the biggest loss is no FPV which is a pretty big negative but all in all I’m pretty pleased with the result and there’s no FISH EYE!
Here’s some photos.
Damper brackets with the aluminium mounts
. by linecutter, on Flickr90 degree mount
. by linecutter, on Flickr. by linecutter, on Flickr45 degree mount
. by linecutter, on Flickr. by linecutter, on FlickrThe result
IMG_2092 by linecutter, on FlickrIMG_2008 by linecutter, on Flickr